4.5.1.1 Overview
FOLIO’s Bulk Edit app is used to make changes to certain fields in certain records in batch. Bulk Edit requires the upload of a file of record identifiers. This file might be created by exporting record information from the List or Inventory apps, or – in the case of item or user barcodes – it might be generated externally to FOLIO. Once the file of identifiers has been uploaded, a user is able to define the fields and values to be edited, then perform the edits.
4.5.1.1.1 Create a File of Record Identifiers
Record Identifiers tell FOLIO which records need to be updated. The different record types editable in Bulk Edit use different possible identifiers detailed below. (Also included are the fields in each record type that can be edited, to save you a long read in case what you want edited doesn’t appear.)
|
Record Type |
Possible Identifiers |
Editable Fields |
|
Instance records (Inventory) |
Instance UUIDs Instance HRIDs |
|
|
Item records (Inventory) |
Item barcodes |
|
|
User records (Users) |
User UUIDs User Barcodes External IDs Usernames |
|
4.5.1.1.1.1 Creating a File Using FOLIO Lists
Once you’ve created your list, click on Actions, then Export list (CSV). FOLIO will download a CSV file containing all of the checked fields shown on the drop down. To use the file for Bulk Edit, you will need to open the file in Excel (or Google sheets or whatever you use), find the column of identifiers you want to use, copy the column and paste it in a new file, then save the file as a CSV. Ensure only the identifiers from records you truly want to change are included on the new file.
Note: The CSV from an Item list includes the Holdings UUID fields, which can be used to identify records for Holdings edits.

4.5.1.1.1.1.1 Holdings
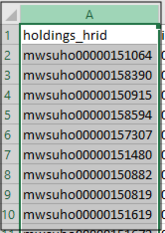
The CSV file for Holdings records includes the following fields that can be used as Identifiers: Holdings UUIDs (column header = Holdings ID) and Holdings HRIDs.

4.5.1.1.1.1.2 Instance
The CSV file for Instance records includes the following fields that can be used as Identifiers: Instance UUIDs and Instance HRIDs.

4.5.1.1.1.1.3 Items
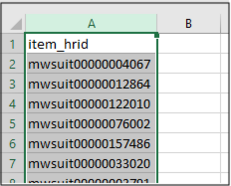
The CSV file for Item records includes the following fields that can be used as Identifiers: Item barcodes, Item UUIDs (column header = id), Item HRIDs, Holdings UUIDs.

4.5.1.1.1.1.4 Users
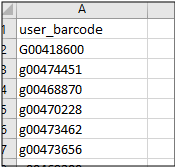
The CSV file for User records includes the following fields that can be used as Identifiers: User UUIDs (column header = User ID), User barcodes, External IDs (User external system id), Usernames.

4.5.1.1.1.2 Creating a File Using Inventory & Data Export
In Quesnelia, it is only possible to export Instance UUIDs from the Inventory app. While the Instance UUIDs are only an identifier field for Instance updates, they can be used in conjunction with Data Export to export a MARC file, which can then be manipulated to extract Identifier fields.
If using the default Instance Export profile, the following Identifiers can be extracted: Instance HRID, Item former identifier. If using a custom Export profile, any of the Identifiers can be extracted.
Ultimately, it’s a much easier process to use the List app, which will export Holdings UUIDs, which can be used as Identifiers for both Holdings and Item bulk edits. However, the Inventory search criteria is more robust than the List searching.
Contact the MCO Help Desk if you want to explore using Inventory and Data Export to create a CSV of Identifier data.
4.5.1.1.1.3 Creating a File Using an External Barcode List
If you have a truck full of books that need to be updated, you can use a scanner wand (or a student) to create a list of Item barcodes in Notepad or Excel. Make sure to save the file as a CSV.
Likewise, if you have a list of User (patron) barcodes, you can create a list of the barcodes in Notepad or Excel. Make sure to save the file as a CSV.
4.5.1.1.2 Import the CSV File of Identifiers into Bulk Edit
Once you have your file of Identifiers, enter the Bulk Edit app.
Select the type of record you want to update, select the Identifier you are going to use, and click on Choose File (alternately, you can drag and drop the CSV file from whatever folder it’s saved in).
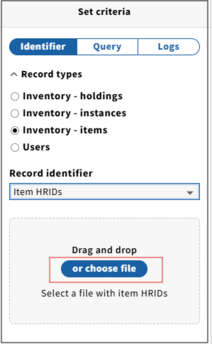
Once the records have finished loading, click on Actions, then “Start bulk edit”
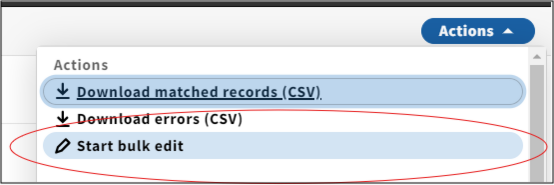
Note that any duplicate or unrecognized identifiers from your CSV file will appear as errors, which can be downloaded to a file for investigation. Note also that if your CSV file has any blank lines, FOLIO will “choke” and not upload the file.
4.5.1.1.3 Create the Bulk Edit Criteria
4.5.1.1.3.1 Options (i.e. editable fields)
Editable fields (Options) are listed above.
4.5.1.1.3.2 Actions
|
Data Type |
Possible Action |
|
Administrative note (Holdings, Item) |
Add note Remove all |
|
Check in note (Item) |
Add note |
|
Electronic access (Holdings): Link text Materials specified URI URL public note |
Clear field Find/Remove Find/Replace with Replace with |
|
Email (User) |
Find/Replace with |
|
Expiration date (User) |
Replace with |
|
Holdings notes (Holdings): Action note Binding Captions Checkin note Copy note Electronic bookplate Identity Internal note Legacy Location Code (Sierra) Library has Message Note Provenance Reproduction Vendor note |
Add note |
|
Item notes (Item): Action note Binding Copy note Copy Use (Sierra) Electronic bookplate Internal note Internal Use (Sierra) Internal Use 3 (Sierra) Last Check In Date (Sierra) Last Check Out Date (Sierra) Last Inventory Date (Sierra) Message Note Price Provenance Public Note Reproduction Total Checkouts (Sierra) Total Renewals (Sierra) |
Add note |
|
Item status (Item) |
Replace with |
|
Loan type: Permanent loan type (Item) |
Replace with |
|
Loan type: Temporary loan type (Item) |
Clear field Replace with |
|
Locations (Item): Permanent location Temporary location |
Clear field Replace with |
|
Locations: Permanent location (Holdings) |
Replace with |
|
Locations: Temporary location (Holdings)
|
Clear field Replace with |
|
Patron group (User) |
Replace with |
|
Notes (Item) |
Add note |
|
Staff suppress (Instance) |
Set true/false |
|
Suppress from discovery (Holdings, Instance, Item) |
Set true/false |
Multiple edits can be configured.
4.5.1.1.4 Run the Bulk Edits
Once you have configured your edits, click on “Confirm changes”
4.5.1.2 Bulk Editing User Records with Bulk Edit (Local)
In addition to making batch edits in User records in the Bulk Edit app, it is also possible to use Bulk Edit to update any of the following fields, using Bulk Edit (Local): Username (not recommended), User UUID (not recommended), External system ID (not recommended), Barcode, Active, Type (patron vs staff), Patron group, Departments, Proxy for, Last name, First name, Middle name, Preferred name, Email, Phone, Mobile phone, Date of birth, Addresses, Preferred contact type id, Link to profile picture, Enrollment date, Expiration date, Tags, Custom fields.
4.5.1.2.1 Before Proceeding, Two Important Notes
Editing User records may disrupt patron batch loading (if the External System ID is changed). Also changes made to User records may be overwritten by batch loaded patrons, if the changes are not reflected in the source database for the patrons (i.e., your campus’s user management system).
Editing any of the following fields in Bulk Edit may result in Users getting an authentication error when logging into Locate, as their record in FOLIO may not match their shell record in Locate:
- First Name
- Last Name
- Username
- Email Address
- External System ID
If this occurs, please open a ticket with the MCO Help Desk (help@mobiusconsortium.org) to have the patron’s shell data changed.
4.5.1.2.2 Create a CSV File of Identifiers and Import the File into Bulk Edit
Follow the instructions above to create a file of Identifier data and import the file into Bulk Edit.
4.5.1.2.3 Download a CSV of Matching Records
Once the identifiers have finished loading, you can download a CSV file of matching User records by clicking on Actions, then “Download matched records (CSV)”.
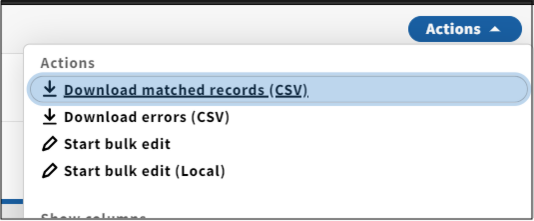
Note that any identifiers that did not find a match in FOLIO will NOT be included on the CSV file of User records.
4.5.1.2.4 Make Edits to the Downloaded CSV of User Records
Make your edits to the data directly in the downloaded CSV file. Note that any field (listed above) in the CSV file may be updated. Remember to save the file as a CSV file.
4.5.1.2.5 Upload the Edited CSV File
Click on Actions, then “Start bulk edit (local)”.
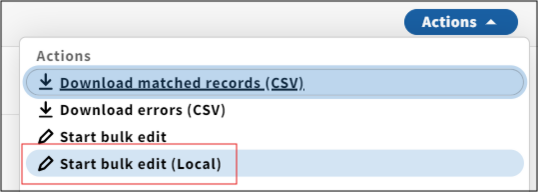
Click on “choose file”, locate and select the downloaded CSV of User records.
Click on Next, then on “Commit changes”.